How To Install Kodi On Raspberry Pi: The Ultimate Guide For Streamers
Listen up, tech enthusiasts and home theater lovers! If you're looking to turn your Raspberry Pi into a media powerhouse, you're in the right place. Installing Kodi on Raspberry Pi is not just a fun project; it’s a game-changer for anyone who wants to enjoy movies, TV shows, and more on their big screen. In this guide, we’ll walk you through every step of the process, from setting up your Raspberry Pi to streaming your favorite content seamlessly. So grab your Pi, and let's get started!
Before we dive in, let me tell you why Kodi is such a big deal. It’s more than just a media player; it’s a customizable platform that lets you access all your media files in one place. With Kodi installed on your Raspberry Pi, you can transform this tiny device into a full-fledged home entertainment system. Whether you’re streaming Netflix, watching local files, or even dabbling in some live TV, Kodi has got you covered.
Now, here's the best part: setting up Kodi on Raspberry Pi is easier than you think. Sure, it might sound intimidating at first, but with this step-by-step guide, even beginners can do it. So whether you're a tech pro or just starting out, this article is your go-to resource for all things Kodi and Raspberry Pi. Let’s make it happen!
- What Restaurants Support Palestine A Deep Dive Into Culinary Advocacy
- 15 Aug Zodiac Unveiling The Mystical Traits Of Leo And Virgo Cusp
Table of Contents:
- What is Kodi?
- Raspberry Pi Overview
- Why Use Kodi on Raspberry Pi?
- Hardware Requirements
- Software Requirements
- Step-by-Step Installation Guide
- Customizing Kodi
- Troubleshooting Tips
- Performance Optimization
- Conclusion
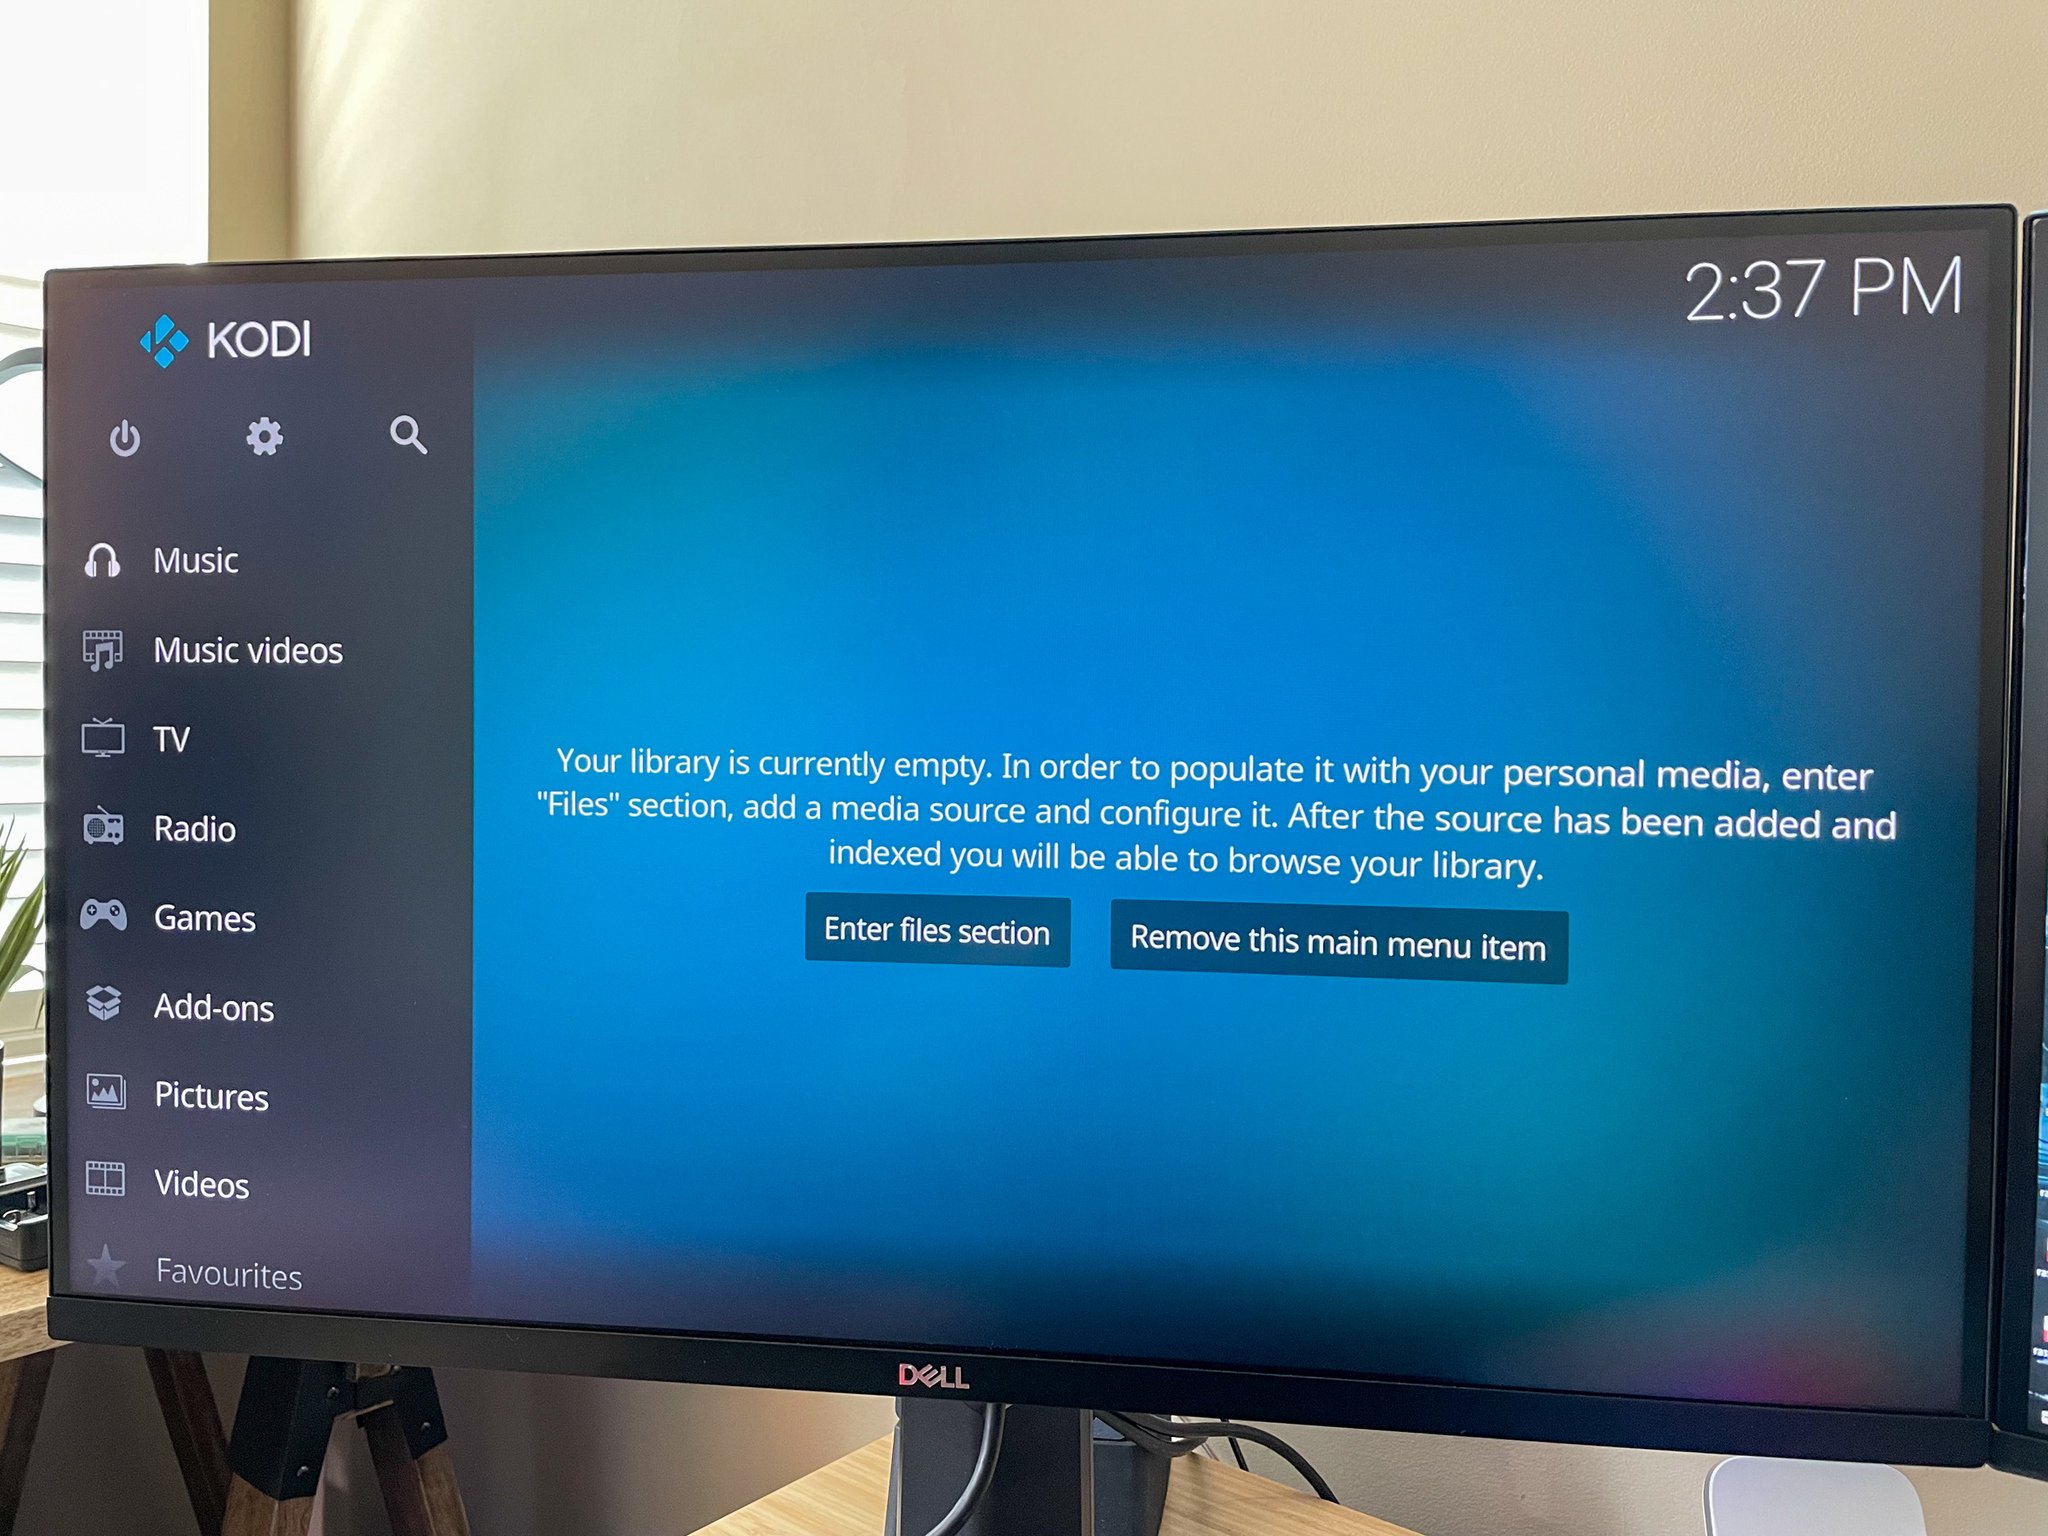
What is Kodi?
Alright, let’s start with the basics. Kodi is an open-source media player software that’s been around since 2002. Originally known as XBMC, it’s evolved into a powerhouse for organizing and playing all kinds of media. From movies and music to photos and live TV, Kodi can handle it all. Plus, it’s completely customizable, meaning you can add plugins, skins, and other features to make it work exactly how you want.
One of the coolest things about Kodi is its community. Thousands of developers contribute to its development, creating new add-ons and features all the time. This means that no matter what kind of content you’re into, there’s probably a way to access it through Kodi. And hey, when you combine that with the affordability and versatility of a Raspberry Pi, you’ve got a match made in tech heaven.
- Sherri Papini Today 2024 The Untold Story You Need To Know
- Exploring The Fascinating World Of Longhorn In Beavercreek Ohio
So, why wait? Let’s see how Kodi can change the way you watch media forever.
Raspberry Pi Overview
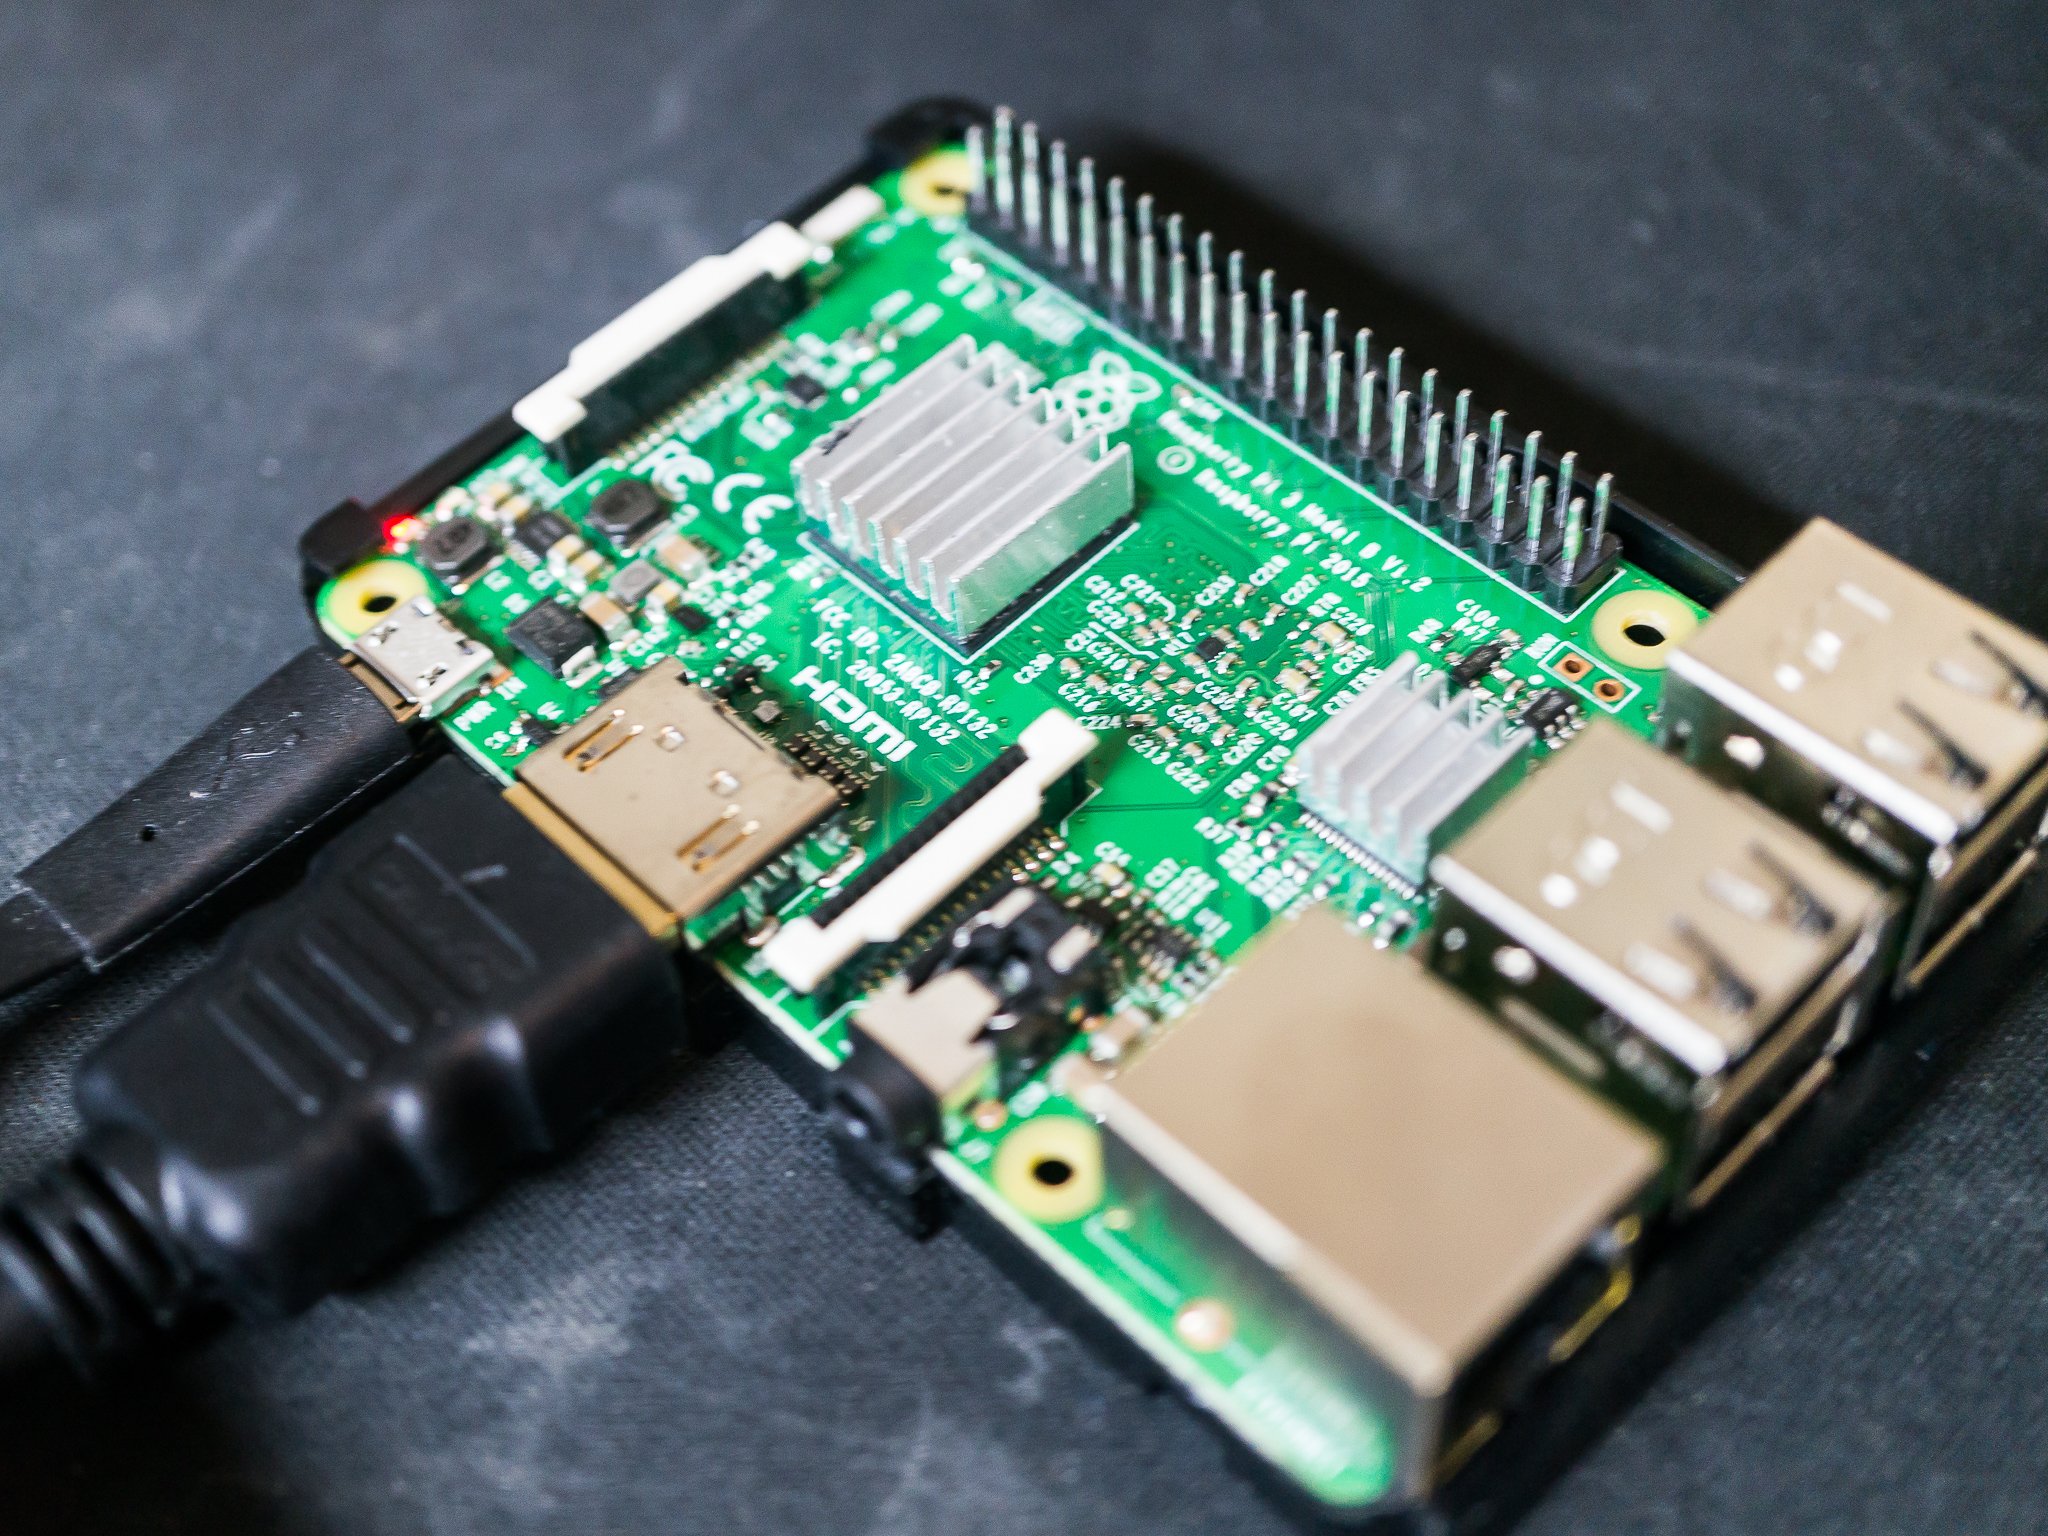
Let’s talk about the star of the show: the Raspberry Pi. This little computer might look tiny, but don’t let its size fool you. It’s packed with power and possibilities. Originally designed as an educational tool, the Raspberry Pi has become a favorite among hobbyists, developers, and tech enthusiasts worldwide. It’s basically a single-board computer that you can use for anything from running a web server to building a retro gaming console.
For our purposes, the Raspberry Pi is perfect for running Kodi. It’s affordable, energy-efficient, and easy to set up. Plus, it’s small enough to fit behind your TV, making it a discreet addition to your living room setup. Depending on your budget and needs, you can choose from different models, but for Kodi, we recommend the Raspberry Pi 4 Model B. It’s got enough processing power to handle 4K video streaming without breaking a sweat.
Why Raspberry Pi is Perfect for Kodi
- Compact size: Fits anywhere in your home theater setup.
- Affordable: You don’t need to spend a fortune on expensive hardware.
- Energy-efficient: Runs on minimal power, keeping your electricity bills low.
- Customizable: You can tweak it to your heart’s content.
Trust me, once you’ve got Kodi running on your Raspberry Pi, you’ll wonder how you ever lived without it.
Why Use Kodi on Raspberry Pi?
Now that we’ve covered the basics, let’s talk about why you should use Kodi on a Raspberry Pi. Sure, you could run Kodi on a desktop or laptop, but there are some unique advantages to using a Pi. First off, it’s way more portable. You can take your setup with you wherever you go, whether it’s to a friend’s house or on vacation. Plus, it’s silent—no fans, no noise, just smooth, quiet performance.
Another big advantage is cost. A Raspberry Pi costs a fraction of what a dedicated media player or streaming device would. And because it’s open-source, you don’t have to worry about subscription fees or proprietary software. You’re in control of your setup, which means you can customize it to fit your exact needs. Whether you want to stream 4K content, play retro games, or even set up a smart home hub, the Raspberry Pi can do it all.
Key Benefits of Kodi on Raspberry Pi
- Cost-effective: Save money without sacrificing performance.
- Customizable: Add-ons and plugins give you endless possibilities.
- Energy-efficient: Uses less power than traditional devices.
- Versatile: Can be used for more than just media streaming.
Let’s face it, the Raspberry Pi is a dream machine for anyone who loves tinkering with tech. And with Kodi, you’ve got a media player that’s as powerful as it is flexible.
Hardware Requirements
Before you start installing Kodi, you’ll need to make sure you’ve got the right hardware. Don’t worry, it’s not complicated. Here’s a quick list of what you’ll need:
- Raspberry Pi (Model 3B+ or 4B recommended)
- MicroSD card (16GB or larger)
- Power supply (official Raspberry Pi power adapter recommended)
- HDMI cable
- Keyboard and mouse (or a Bluetooth controller)
- Internet connection (Wi-Fi or Ethernet)
That’s it! Once you’ve got all your hardware ready, you’re good to go. If you’re new to Raspberry Pi, don’t stress—it’s super easy to set up. Just plug everything in, and you’ll be ready to install Kodi in no time.
Software Requirements
Now let’s talk about the software side of things. To install Kodi on your Raspberry Pi, you’ll need to use an operating system that supports it. The easiest way to do this is by using Raspberry Pi OS, which comes with everything you need to get started. Alternatively, you can use a Kodi-specific image like LibreELEC or OSMC, which are lightweight and optimized for media streaming.
Here’s a quick breakdown of your options:
- Raspberry Pi OS: A general-purpose operating system that’s great for beginners.
- LibreELEC: A lightweight OS designed specifically for Kodi.
- OSMC: Another Kodi-focused OS with a user-friendly interface.
For this guide, we’ll be using LibreELEC because it’s fast, efficient, and easy to set up. But feel free to experiment with the others if you’re feeling adventurous.
Step-by-Step Installation Guide
Alright, let’s get down to business. Here’s how you install Kodi on your Raspberry Pi in just a few simple steps:
Step 1: Download LibreELEC
Head over to the LibreELEC website and download the latest image file. Make sure you select the version that matches your Raspberry Pi model.
Step 2: Flash the Image to Your MicroSD Card
Use a tool like Balena Etcher to flash the LibreELEC image to your MicroSD card. This will prepare your Pi to boot into LibreELEC.
Step 3: Boot Your Raspberry Pi
Insert the MicroSD card into your Raspberry Pi, connect it to your TV via HDMI, and power it on. LibreELEC should boot up automatically.
Step 4: Connect to Wi-Fi
During the setup process, you’ll be prompted to connect to your Wi-Fi network. Enter your credentials, and you’re good to go.
Step 5: Update Kodi
Once LibreELEC is up and running, head to the settings menu and check for updates. This will ensure you’re running the latest version of Kodi.
And that’s it! You’ve now got Kodi up and running on your Raspberry Pi. Wasn’t that easy?
Customizing Kodi
Now that you’ve got Kodi installed, it’s time to make it your own. Kodi is all about customization, so let’s explore some of the ways you can personalize your setup:
- Change the skin: Kodi comes with a variety of skins that let you change the look and feel of the interface.
- Add plugins: There are thousands of plugins available that add new features and content sources to Kodi.
- Organize your media: Use Kodi’s built-in library functions to organize your movies, TV shows, and music.
- Set up remote control: Use a smartphone app or Bluetooth controller to control Kodi from anywhere in the room.
The possibilities are endless, so take some time to experiment and see what works best for you.
Troubleshooting Tips
Even the best setups can run into issues sometimes. Here are a few common problems you might encounter and how to fix them:
- Slow performance: Try disabling unused add-ons or upgrading your Raspberry Pi model.
- Connection issues: Make sure your Wi-Fi is stable or switch to Ethernet for a more reliable connection.
- Playback problems: Check your codec settings or try a different video player.
Remember, troubleshooting is all about patience. If something doesn’t work right away, take a deep breath and try again. You’ve got this!
Performance Optimization
Want to get the most out of your Kodi setup? Here are a few tips to optimize performance:
- Use a fast MicroSD card: A Class 10 card will help with loading times and overall speed.
- Disable unused services: Turn off any features you don’t need to free up resources.
- Keep Kodi updated: Regular updates bring performance improvements and bug fixes.
By following these tips, you can ensure that your Raspberry Pi runs smoothly and efficiently.
Conclusion
Well, there you have it! Installing Kodi on your Raspberry Pi is easier than you might think, and the rewards are well worth the effort. From streaming your favorite movies to organizing your media library, Kodi offers endless possibilities for entertainment. And with the affordability and versatility of the Raspberry Pi, you’ve got a setup that’s both powerful and budget-friendly.
So what are you waiting for? Grab your Raspberry Pi, follow this guide, and start streaming today. And don’t forget to share your experience in the comments below. We’d love to hear how your setup turned out!
Until next time, happy streaming!
- Los Angeles Best Fast Food Your Ultimate Guide To Musttry Eats
- Mastering The Art Of Sign In Ets Your Ultimate Guide

How to install Kodi on a Raspberry Pi Android Central
How to install Kodi on a Raspberry Pi in 2021 Android Central
How to install Kodi on a Raspberry Pi Android Central
