How To Install Kodi On Raspberry Pi: The Ultimate Guide For Streamers
So, you’ve finally decided to take the plunge into the world of media streaming with Raspberry Pi and Kodi? Great choice! Installing Kodi on Raspberry Pi is one of the best ways to turn your tiny computer into a powerful media center. Whether you’re a tech enthusiast or just someone looking to set up a budget-friendly home theater, this guide will walk you through every step of the process. Trust me, it’s easier than you think!
Let’s face it – Raspberry Pi is more than just a hobbyist’s toy. It’s a powerhouse that can handle everything from running emulators to serving as a fully-fledged media player. And when you pair it with Kodi, the possibilities are endless. From streaming your favorite movies and TV shows to organizing your media library, Kodi on Raspberry Pi is a match made in heaven.
But hold up – before we dive into the nitty-gritty, let’s clear something up. Installing Kodi on Raspberry Pi isn’t rocket science, but it does require a bit of patience and attention to detail. Don’t worry, though; by the end of this guide, you’ll be streaming like a pro. So, grab a cup of coffee, sit back, and let’s get started!
- Vitamin Brands To Avoid Uncovering The Truth Behind Your Supplements
- Daisy From Dukes Of Hazzard Today The Journey Life And Legacy
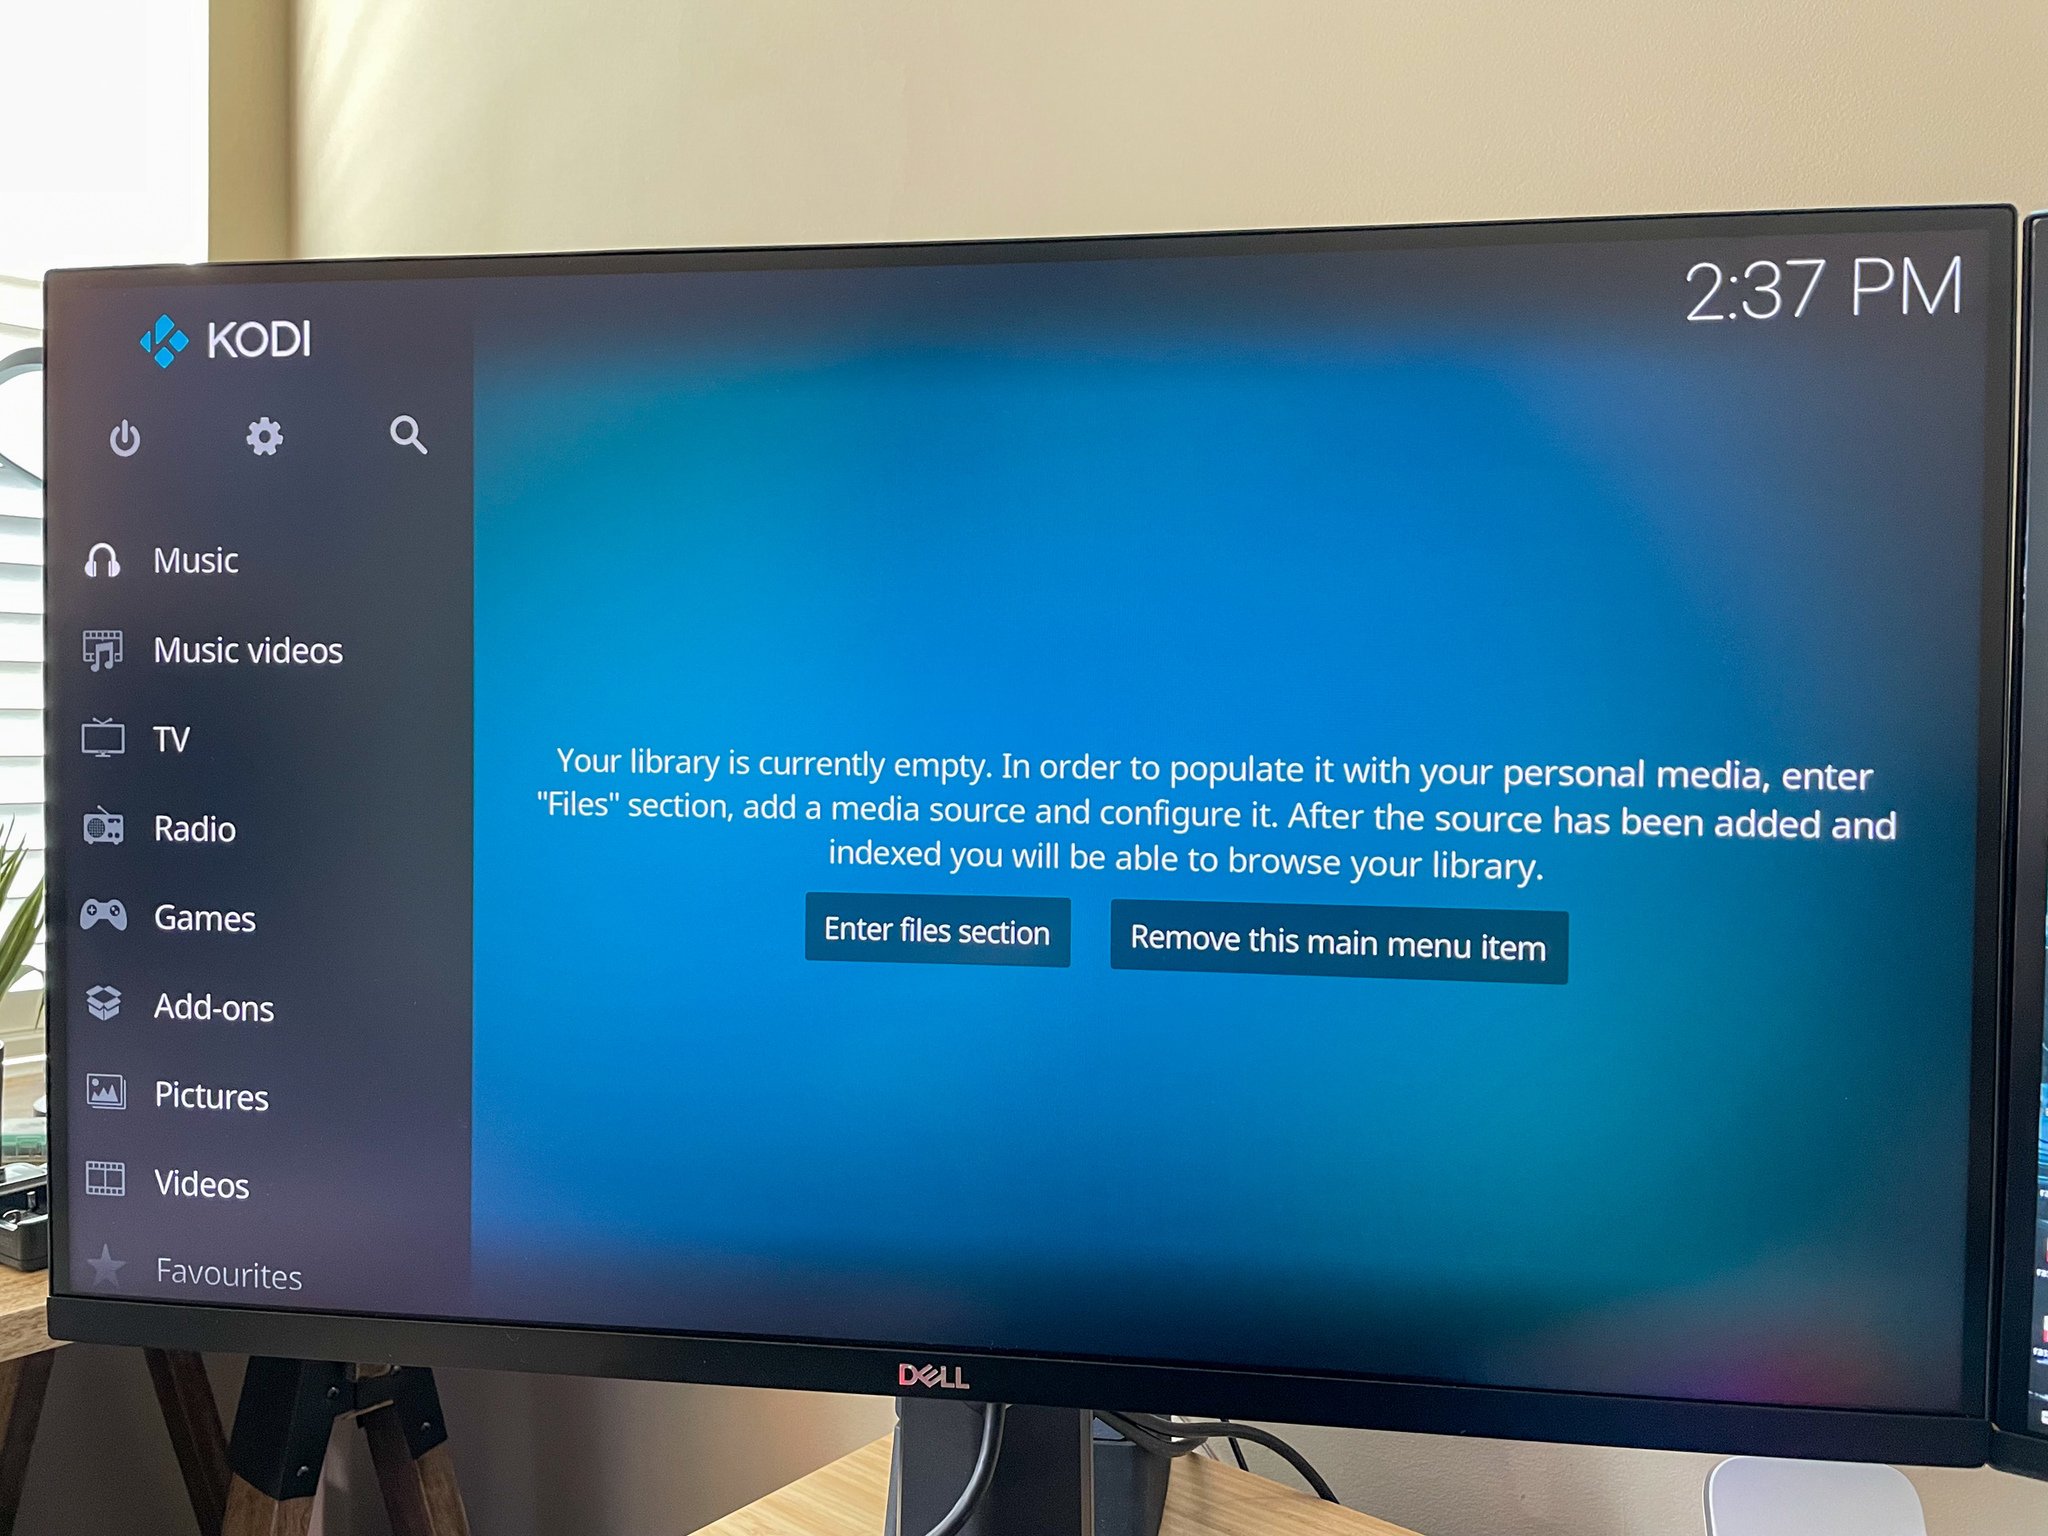
Why Install Kodi on Raspberry Pi?
Alright, let’s talk about why you’d even want to install Kodi on Raspberry Pi in the first place. Sure, Kodi is awesome, and Raspberry Pi is cool, but what happens when you combine the two? Magic. Plain and simple.
Here’s the deal: Kodi is an open-source media player that lets you stream, organize, and play all your favorite media files. Think of it as the Swiss Army knife of media players. Now, pair that with Raspberry Pi, which is basically a mini computer that’s affordable, energy-efficient, and incredibly versatile, and you’ve got yourself a killer combo.
Oh, and did I mention that Raspberry Pi can run Kodi smoothly without breaking a sweat? Whether you’re using an older model like the Raspberry Pi 3 or the newer Raspberry Pi 4, you’ll be amazed at how well it handles everything Kodi throws its way.
- Petrie The Unsung Hero Of Archaeology You Need To Know
- Michigan Governors Social Media Presence A Comprehensive Guide
What You’ll Need to Get Started
Before we jump into the installation process, let’s make sure you’ve got everything you need. You don’t want to be halfway through and realize you’re missing a crucial piece of the puzzle, right? Here’s a quick checklist:
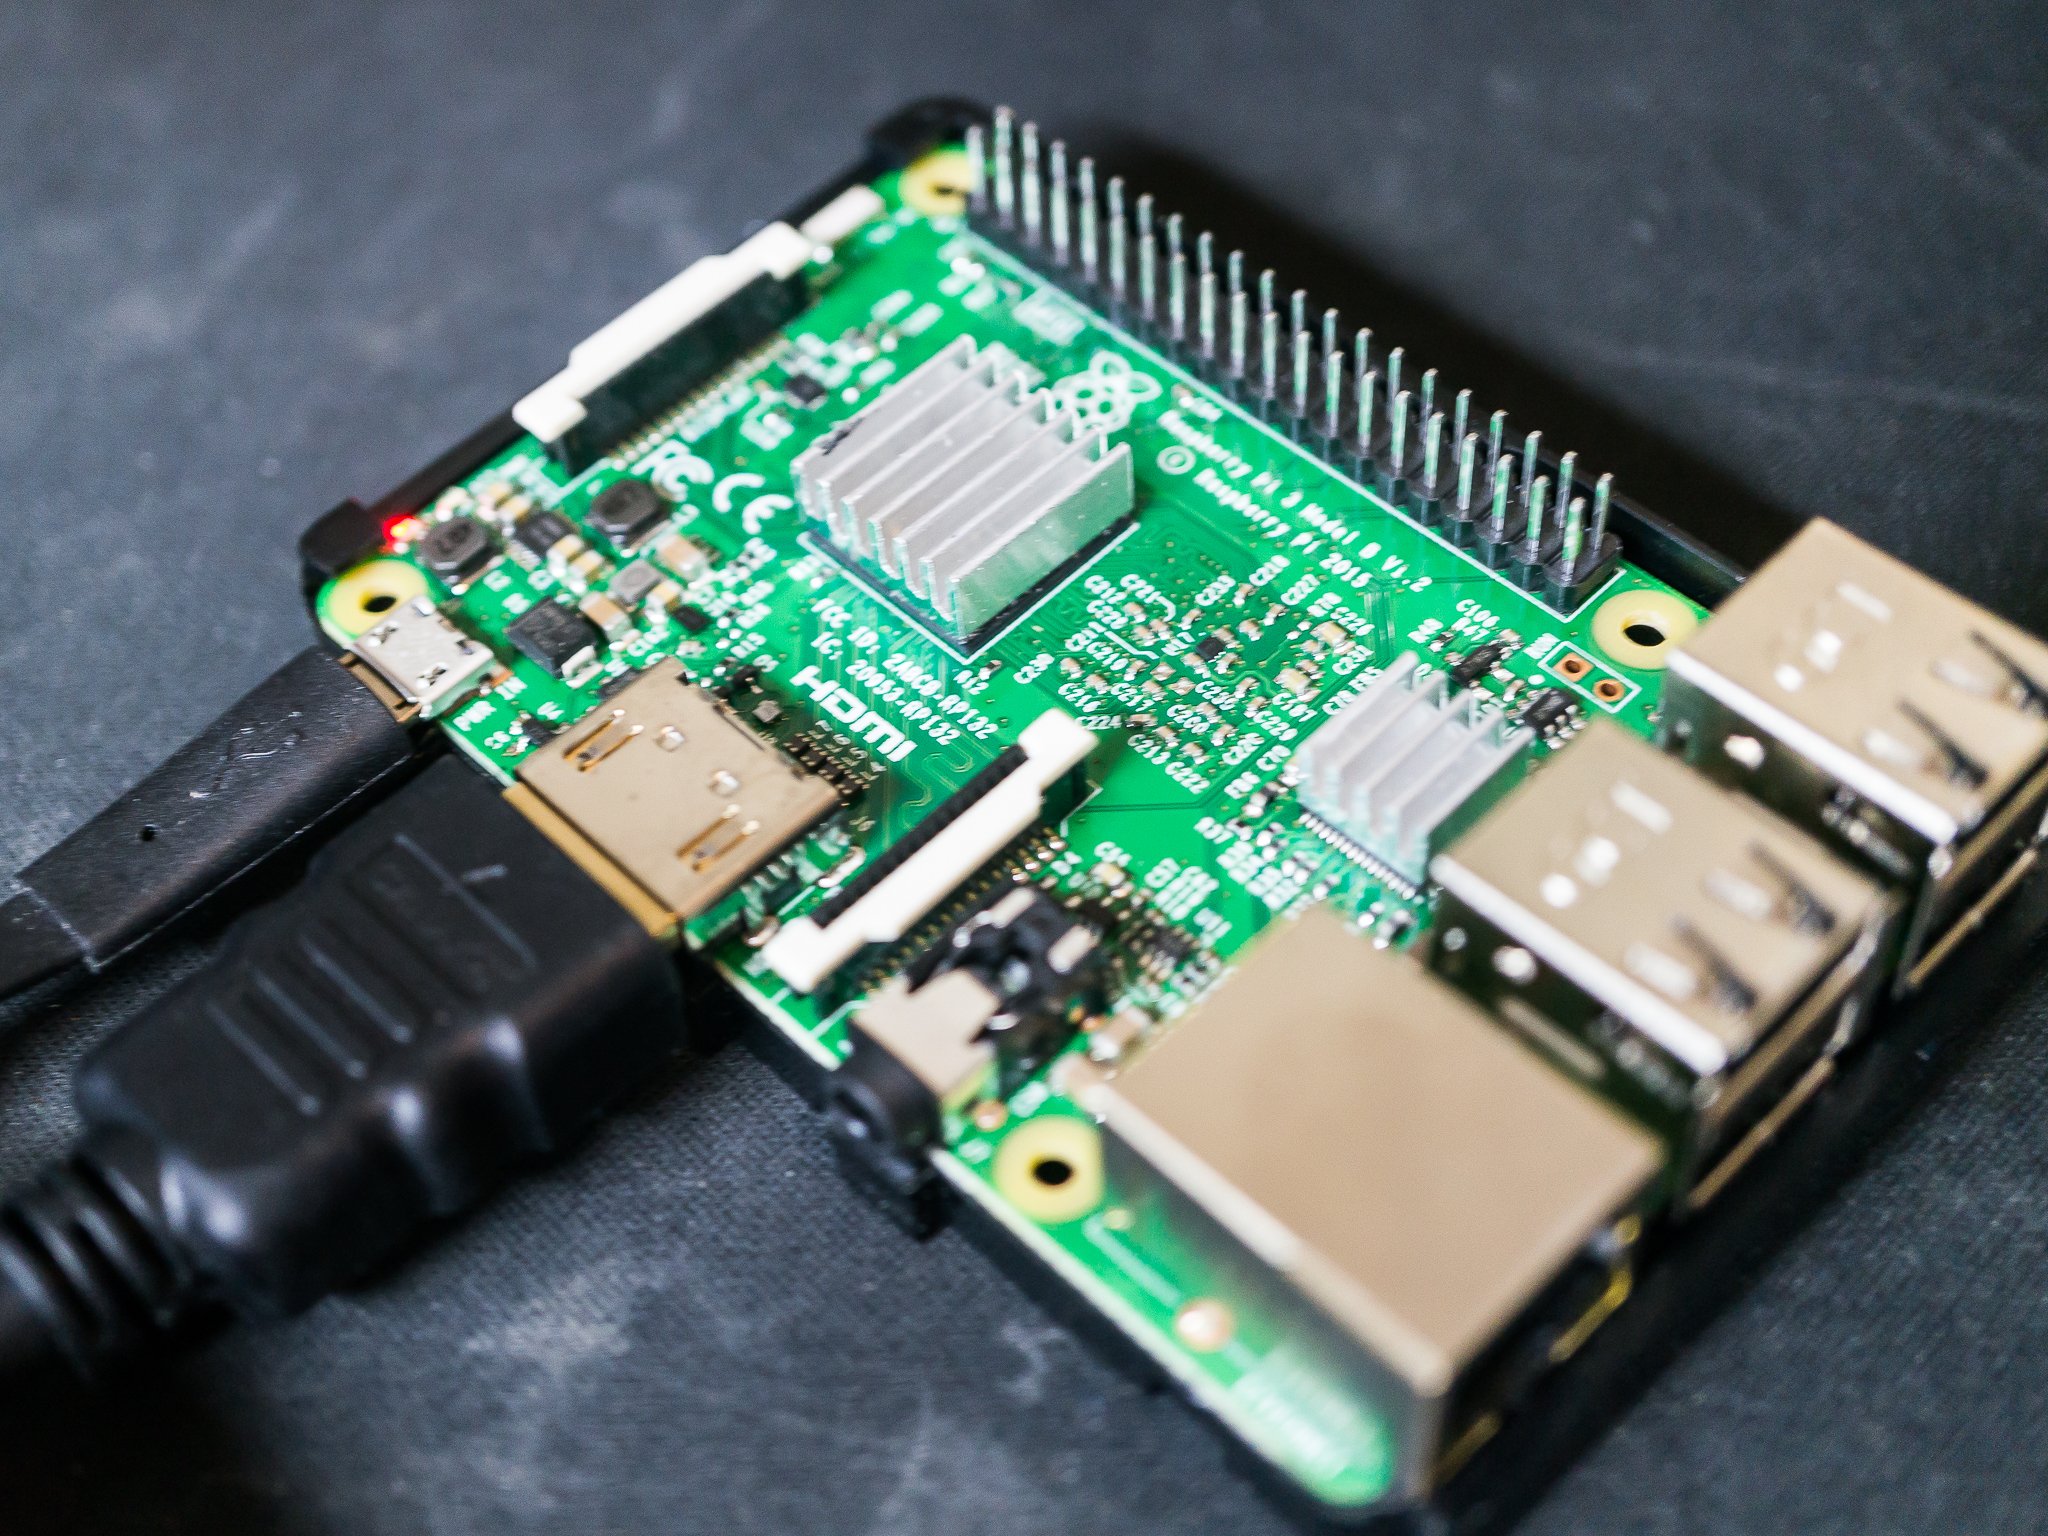
- Raspberry Pi (Model 3 or 4 recommended)
- A microSD card (16GB or higher)
- A power supply for your Raspberry Pi
- An HDMI cable (if you’re connecting to a TV or monitor)
- A keyboard and mouse (or a remote if you’re using a media center setup)
- An internet connection (duh!)
Once you’ve got all that sorted, you’re ready to roll. Easy peasy, right?
Step-by-Step Guide to Installing Kodi on Raspberry Pi
Now that you’ve got everything you need, let’s walk through the installation process step by step. I promise it’s not as complicated as it sounds.
1. Download the Latest Version of Raspberry Pi OS
The first thing you’ll need to do is grab the latest version of Raspberry Pi OS. You can download it from the official Raspberry Pi website. Make sure you choose the version with desktop support, as Kodi requires a graphical interface to run properly.
2. Flash the OS to Your MicroSD Card
Once you’ve downloaded the OS, you’ll need to flash it onto your microSD card. There are a few tools you can use for this, but I recommend using Raspberry Pi Imager. It’s simple, reliable, and works like a charm.
3. Boot Up Your Raspberry Pi
With the OS flashed onto your microSD card, it’s time to boot up your Raspberry Pi. Insert the card into your Pi, connect it to your TV or monitor, and power it on. You should see the Raspberry Pi OS loading screen after a few seconds.
4. Update Your System
Before installing Kodi, it’s a good idea to update your system to ensure everything’s running smoothly. Open up a terminal and type in the following commands:
- sudo apt update
- sudo apt upgrade
Let the system do its thing, and you’ll be good to go.
5. Install Kodi
Now for the main event – installing Kodi. You can do this by typing the following command into the terminal:
- sudo apt install kodi
Once the installation is complete, you’ll find Kodi in your applications menu. Easy, right?
Tips and Tricks for Optimizing Kodi on Raspberry Pi
Alright, you’ve installed Kodi on your Raspberry Pi. Congrats! But wait – there’s more. Here are a few tips and tricks to help you get the most out of your new media center.
1. Customize Your Kodi Interface
Kodi is highly customizable, so don’t be afraid to play around with the settings. You can change the skin, add widgets, and even create custom menus to suit your preferences.
2. Use Add-ons Wisely
Add-ons are what make Kodi so powerful, but they can also slow down your system if you’re not careful. Stick to reputable add-ons from trusted sources, and you’ll be fine.
3. Keep Your System Updated
Just like any other software, Kodi and Raspberry Pi OS need regular updates to stay secure and perform at their best. Make it a habit to check for updates every now and then.
Common Issues and How to Fix Them
Even the best-laid plans can hit a snag sometimes. Here are a few common issues you might encounter when installing Kodi on Raspberry Pi and how to fix them.
1. Slow Performance
If you’re experiencing slow performance, try disabling unnecessary add-ons or tweaking the settings in Kodi to reduce the load on your system.
2. Audio Issues
Audio problems can be frustrating, but they’re usually easy to fix. Check your audio settings in Kodi and make sure they’re configured correctly for your setup.
3. Connectivity Problems
If you’re having trouble connecting to the internet, double-check your network settings and ensure your Raspberry Pi is properly connected to your router.
Is Kodi Legal on Raspberry Pi?
This is a question that comes up a lot, so let’s clear it up once and for all. Kodi itself is completely legal. It’s an open-source media player that’s designed to help you organize and stream your media files. Where things can get murky is when you start using unauthorized add-ons to stream copyrighted content.
So, stick to legitimate sources, and you’ll be in the clear. Simple as that.
Alternatives to Kodi for Raspberry Pi
While Kodi is undoubtedly one of the best media players out there, it’s not the only option. Here are a few alternatives you might want to check out:
- PLEX – Great for streaming and organizing your personal media library
- Emby – Another fantastic option for managing your media files
- Osmc – A lightweight media center based on Kodi
Each of these has its own strengths and weaknesses, so it’s worth exploring them to see which one suits your needs best.
Final Thoughts: Why You Should Install Kodi on Raspberry Pi
So, there you have it – everything you need to know about installing Kodi on Raspberry Pi. It’s a simple process that can transform your tiny computer into a media powerhouse. Whether you’re streaming movies, organizing your music collection, or experimenting with add-ons, Kodi on Raspberry Pi is a fantastic choice.
And hey, if you’ve made it this far, why not share your experience in the comments? Let me know how your installation went, or drop a line if you’ve got any questions. The more we share, the more we learn, right?
Table of Contents
- Why Install Kodi on Raspberry Pi?
- What You’ll Need to Get Started
- Step-by-Step Guide to Installing Kodi on Raspberry Pi
- Tips and Tricks for Optimizing Kodi on Raspberry Pi
- Common Issues and How to Fix Them
- Is Kodi Legal on Raspberry Pi?
- Alternatives to Kodi for Raspberry Pi
- Final Thoughts: Why You Should Install Kodi on Raspberry Pi
- Kamala The Ultimate Guide To Finnish To English Translation
- Cumberland River Body Discoveries Unraveling The Secrets Beneath The Waters
How to install Kodi on a Raspberry Pi in 2022 Android Central
How to install Kodi on a Raspberry Pi Android Central

How to install Kodi on a Raspberry Pi Android Central
